Building Tensorflow Lite on the BBAI Works but Examples are Given me the Willies!

Hello,

I built the tflite module on the AI since porting it is maybe out of the question. So anyway, it is built.

I have access to making python3.9 work w/ the TFLite module on the BBAI. I have come across some issues. I am following along in this udacity classroom to get example source and ideas relating to TFLite.

Here is the class online: Udacity . Anyway, if you are using TFLite on the BBAI and wondering how to offload and work w/ examples, I think this post can help the community at large.

Seth

P.S. Here is the source I am working on right now:


import tensorflow as tf

import pathlib
import numpy as np
import matplotlib.pyplot as plt

from tensorflow.keras.models import Model
from tensorflow.keras.layers import Input

# Create a simple Keras model.
x = [-1, 0, 1, 2, 3, 4]
y = [-3, -1, 1, 3, 5, 7]

model = tf.keras.models.Sequential([
    tf.keras.layers.Dense(units=1, input_shape=[1])
])
model.compile(optimizer='sgd', loss='mean_squared_error')
model.fit(x, y, epochs=200, verbose=1)

export_dir = 'saved_model/1'
tf.saved_model.save(model, export_dir)

# Convert the model.
converter = tf.lite.TFLiteConverter.from_saved_model(export_dir)
tflite_model = converter.convert()

tflite_model_file = pathlib.Path('model.tflite')
tflite_model_file.write_bytes(tflite_model)

# Load TFLite model and allocate tensors.
interpreter = tf.lite.Interpreter(model_content=tflite_model)
interpreter.allocate_tensors()

# Get input and output tensors.
input_details = interpreter.get_input_details()
output_details = interpreter.get_output_details()

# Test the TensorFlow Lite model on random input data.
input_shape = input_details[0]['shape']
inputs, outputs = [], []
for _ in range(100):
  input_data = np.array(np.random.random_sample(input_shape), dtype=np.float32)
  interpreter.set_tensor(input_details[0]['index'], input_data)

  interpreter.invoke()
  tflite_results = interpreter.get_tensor(output_details[0]['index'])

  # Test the TensorFlow model on random input data.
  tf_results = model(tf.constant(input_data))
  output_data = np.array(tf_results)
  
  inputs.append(input_data[0][0])
  outputs.append(output_data[0][0])

plt.plot(inputs, outputs, 'r')
plt.show()


try:
  from google.colab import files
  files.download(tflite_model_file)
except:
  pass

Now…from what I understand so far, I think I need to supply a working, say, Debian Distro w/ TensorFlow on it so this software can ultimately make the TensorFlow-Lite module. Does this seem correct? Anyway…if you are into making the BBAI guess with education on what may take place w/ tensors, please reply. I am sure we can work on this together or w/ another portion of the community.
Hello Again,

So, it seems I may have mistaken the tensor entirety as something it was not. In any light, I need to build TensorFlow on the dev. desktop and then proceed to transfer the builds of the tensor to the TFLite, e.g. which the AI can handle.

Now, about offloading to DSPs or EVEs, I am open to suggestions as I will be looking now and in the future for efforts to this issue.

Seth

P.S. I will be reporting back once I can configure my first tensor into TFLite models which the BBAI can then handle and promote in specific quality.

Hello,

I almost forgot to provide building instructions for the BBAI w/:

uname -a: Linux BeagleBone 5.10.59-ti-r22 #1bullseye SMP PREEMPT Wed Sep 29 17:33:28 UTC 2021 armv7l GNU/Linux

cat /etc/dogtag: BeagleBoard.org Debian Bullseye IoT Image 2021-10-02

That exact image and others can be found here: Index of /rootfs/debian-armhf/2021-10-02


git clone https://github.com/tensorflow/tensorflow.git

sudo apt install cmake 

# There may be other dep. you will need but Debian is smart and will notify you...

mkdir tflite_build && cd tflite_build

cmake ../tensorflow/lite

cmake --build .

cmake ../tensorflow/lite/c

cmake --build .

That should do it. It may take a while b/c of 1.5Ghz of CPU power but there are other factors involved, i.e. other CPU tasks being taken up.

Also, if you have questions, please refer to this idea: Build TensorFlow Lite with CMake

I found that the build natively is painless compared to what to do w/ the build once it is finished w/ Cross-Compiling.

Seth

P.S. I am currently building the TensorFlow lib. now on a Debian Machine. I will update in accordance w/ this short.

Oh and also, this does not work as you can tell. We are using an entirely different toolchain on this build for native and/or cross-compiling.


ARMCC_FLAGS="-march=armv7-a -mfpu=neon-vfpv4 -funsafe-math-optimizations"
ARMCC_PREFIX=${HOME}/toolchains/gcc-arm-8.3-2019.03-x86_64-arm-linux-gnueabihf/bin/arm-linux-gnueabihf-
cmake -DCMAKE_C_COMPILER=${ARMCC_PREFIX}gcc \
  -DCMAKE_CXX_COMPILER=${ARMCC_PREFIX}g++ \
  -DCMAKE_C_FLAGS="${ARMCC_FLAGS}" \
  -DCMAKE_CXX_FLAGS="${ARMCC_FLAGS}" \
  -DCMAKE_VERBOSE_MAKEFILE:BOOL=ON \
  -DCMAKE_SYSTEM_NAME=Linux \
  -DCMAKE_SYSTEM_PROCESSOR=armv7 \
  ../tensorflow/lite/

and…

Please remember if you come across issues to use this cmake command: -DTFLITE_ENABLE_XNNPACK=OFF

It is on by default for Linux builds and cannot be used for many reasons, e.g. NEON does not support it.

Hello,

First and foremost…the build env. for bazel and tensorflow outside of tensorflow-lite needs to be done this way or other complications arise.

bazel --version: bazel 4.2.1

Build Environment: Linux MoreKT 5.4.72-microsoft-standard-WSL2 #1 SMP Wed Oct 28 23:40:43 UTC 2020 x86_64 GNU/Linux or any Debian Distro with Bullseye will do…

Here are the connections and commands needing to be made to build successfully.


sudo apt install apt-transport-https curl gnupg

curl -fsSL https://bazel.build/bazel-release.pub.gpg | gpg --dearmor > bazel.gpg

sudo mv bazel.gpg /etc/apt/trusted.gpg.d/

echo "deb [arch=amd64] https://storage.googleapis.com/bazel-apt stable jdk1.8" | sudo tee /etc/apt/sources.list.d/bazel.list

sudo apt update && sudo apt install bazel

sudo apt update && sudo apt full-upgrade

That is the bazel install that should take place to get the required build items ready. It can also be found here: Installing Bazel on Ubuntu - Bazel main

Also…we can now move to Build from source  |  TensorFlow for using the build on WSL2 Debian Bullseye. This is NOT using a virtual env.


sudo apt install python3-dev python3-pip

pip install -U --user pip numpy wheel
pip install -U --user keras_preprocessing --no-deps

git clone https://github.com/tensorflow/tensorflow.git
cd tensorflow

./configure

There will be a plethora of questions to answer. I think six or less. All are okay as default unless you are using specific instances of use case scenarios. Anyway…I typed N for most or just plane ENTER as the command for DEFAULT.


bazel build //tensorflow/tools/pip_package:build_pip_package

# The above command will build version 2 of tensorflow and it takes a bit.
# I have an older computer with a quad-core set of processors. 
# It took about 12000 files and then it was done after three hours. Blah...

./bazel-bin/tensorflow/tools/pip_package/build_pip_package /tmp/tensorflow_pkg

# The above command will install the lib. in /tmp/tensorflow_pkg
# Then once that builds, you can go to that dir. and see the file that produced
# Copy it.
# It will need to be installed via pip3 or pip since Bullseye does not support Python2

pip install /tmp/tensorflow_pkg/tensorflow-version-tags.whl

# and where it states /tmp/tensorflow_pkg/tensorflow-version-tags.whl, use the copied file.

Now, everyone can hopefully help out if you build it. I am thinking something is wrong right now w/ transferring with cmake to the BBAI from the development desktop.

Seth

Hello and One Last Thing,

I have not gotten this completely configured to handle DSPs or EVEs but it works on the Debian Machine. See here:


#!/usr/bin/python3

# Copyright 2018 The TensorFlow Authors. All Rights Reserved.
#
# Licensed under the Apache License, Version 2.0 (the "License");
# you may not use this file except in compliance with the License.
# You may obtain a copy of the License at
#
#     http://www.apache.org/licenses/LICENSE-2.0
#
# Unless required by applicable law or agreed to in writing, software
# distributed under the License is distributed on an "AS IS" BASIS,
# WITHOUT WARRANTIES OR CONDITIONS OF ANY KIND, either express or implied.
# See the License for the specific language governing permissions and
# limitations under the License.
# ==============================================================================
"""label_image for tflite."""

import argparse
import time

import numpy as np
from PIL import Image
import tensorflow as tf


def load_labels(filename):
  with open(filename, 'r') as f:
    return [line.strip() for line in f.readlines()]


if __name__ == '__main__':
  parser = argparse.ArgumentParser()
  parser.add_argument(
      '-i',
      '--image',
      default='birdie.JPG',
      help='image to be classified')
  parser.add_argument(
      '-m',
      '--model_file',
      default='tensors/mobilenet_v1_1.0_224_quant.tflite',
      help='.tflite model to be executed')
  parser.add_argument(
      '-l',
      '--label_file',
      default='tensors/labels_mobilenet_quant_v1_224.txt',
      help='name of file containing labels')
  parser.add_argument(
      '--input_mean',
      default=127.5, type=float,
      help='input_mean')
  parser.add_argument(
      '--input_std',
      default=127.5, type=float,
      help='input standard deviation')
  parser.add_argument(
      '--num_threads', default=None, type=int, help='number of threads')
  args = parser.parse_args()

  interpreter = tf.lite.Interpreter(
      model_path=args.model_file, num_threads=args.num_threads)
  interpreter.allocate_tensors()

  input_details = interpreter.get_input_details()
  output_details = interpreter.get_output_details()

  # check the type of the input tensor
  floating_model = input_details[0]['dtype'] == np.float32

  # NxHxWxC, H:1, W:2
  height = input_details[0]['shape'][1]
  width = input_details[0]['shape'][2]
  img = Image.open(args.image).resize((width, height))

  # add N dim
  input_data = np.expand_dims(img, axis=0)

  if floating_model:
    input_data = (np.float32(input_data) - args.input_mean) / args.input_std

  interpreter.set_tensor(input_details[0]['index'], input_data)

  start_time = time.time()
  interpreter.invoke()
  stop_time = time.time()

  output_data = interpreter.get_tensor(output_details[0]['index'])
  results = np.squeeze(output_data)

  top_k = results.argsort()[-5:][::-1]
  labels = load_labels(args.label_file)
  for i in top_k:
    if floating_model:
      print('{:08.6f}: {}'.format(float(results[i]), labels[i]))
    else:
      print('{:08.6f}: {}'.format(float(results[i] / 255.0), labels[i]))

  print('time: {:.3f}ms'.format((stop_time - start_time) * 1000))

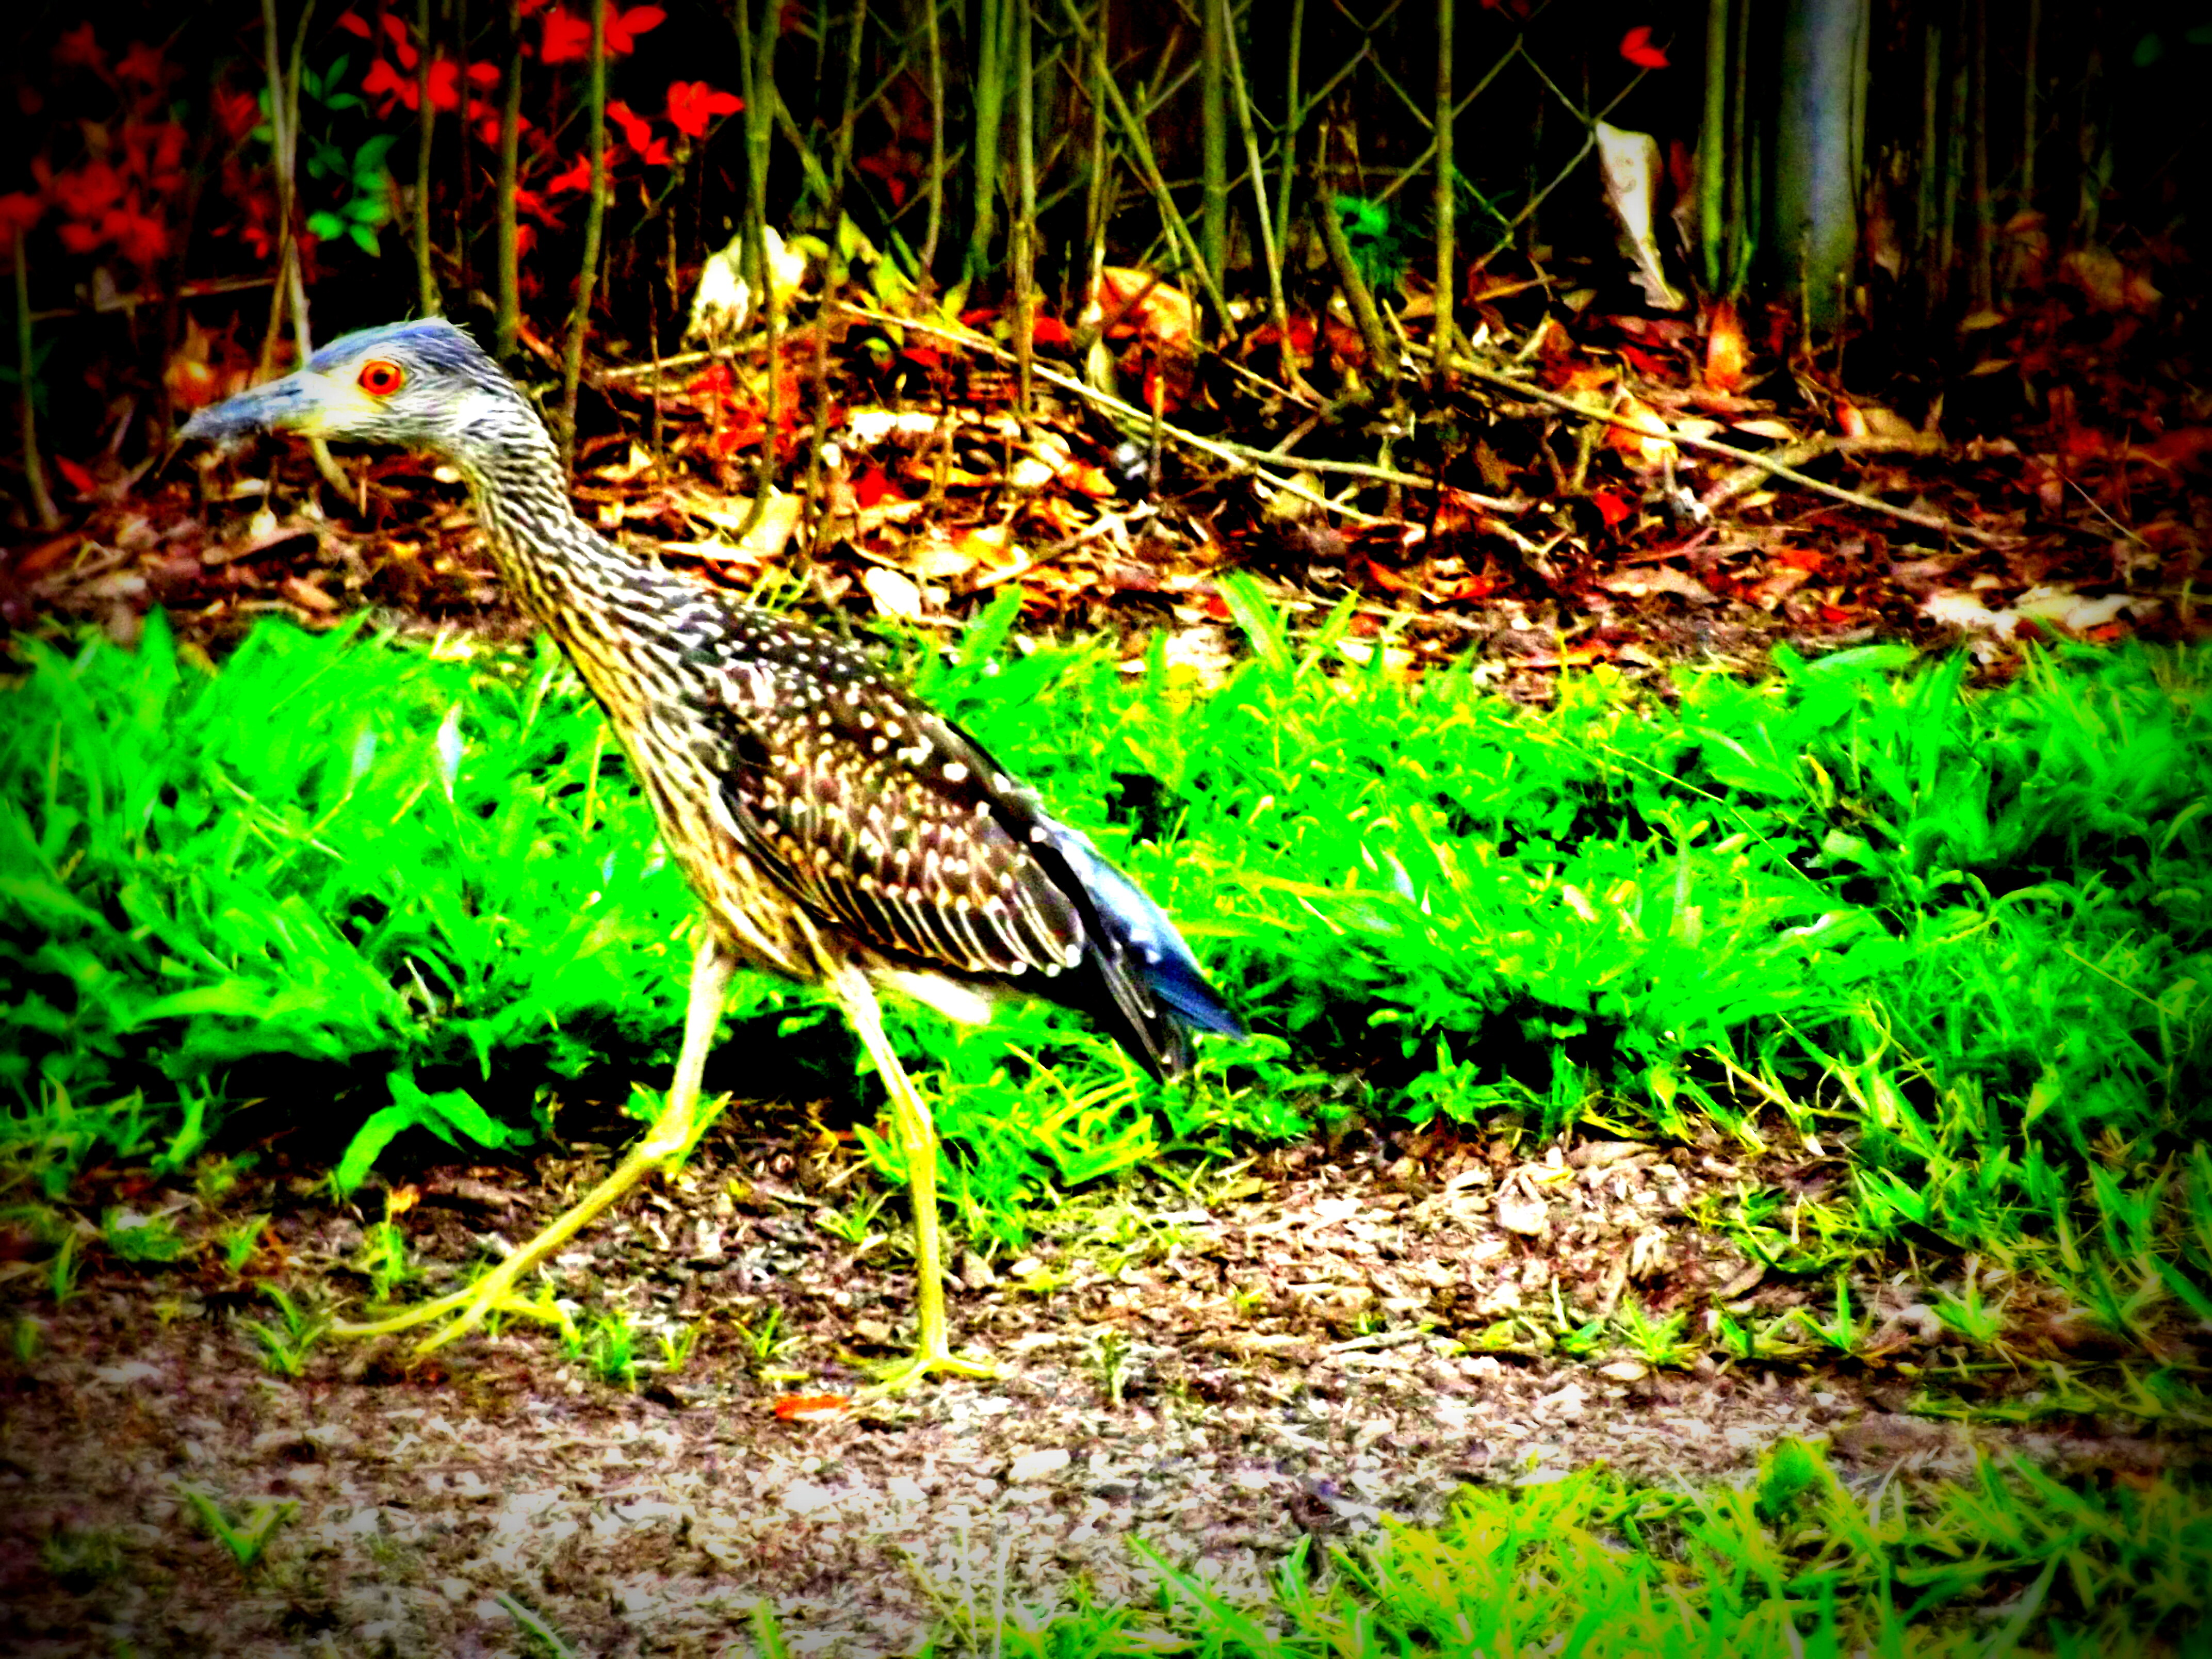
  1. Where the image birdie.JPG is one of my own.

birdie

  1. Where the outcome on tensorflow in python3.9 is this:

0.592157: limpkin
0.133333: American alligator
0.113725: peacock
0.082353: ruffed grouse
0.011765: quail
time: 76.463ms

and…

  1. Where none was right but you can see why…

  2. Where this below .zip file contains all the required data for testing, e.g. .txt file and .tflite file.

wget https://storage.googleapis.com/download.tensorflow.org/models/tflite/mobilenet_v1_1.0_224_quant_and_labels.zip

Seth

P.S. That should do it. Now…I need to configure how to add this data, the source, and the build to the BBAI and offload the high volume of memory and data to the slave processors.

Hello and Okay,

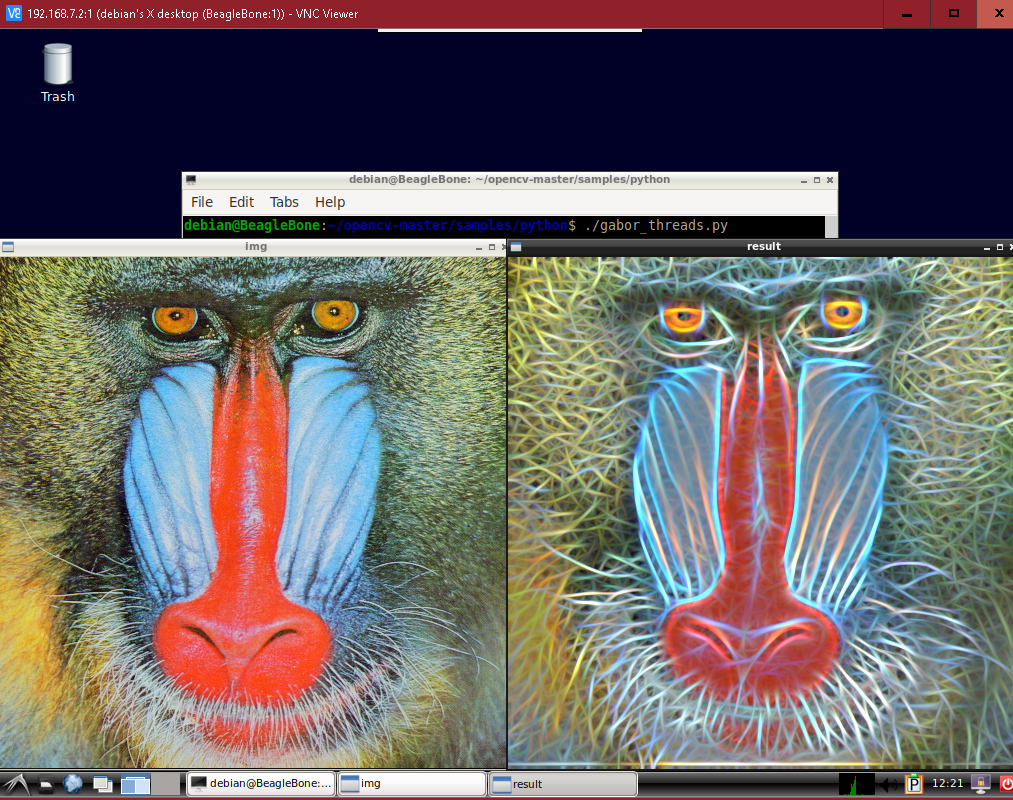
Geaux Cajuns and BBBs, i.e. in this case, a BBAI. I got the info. installed correctly and I would like to share the ultimate photo of a Gabor done w/ OpenCV but superimposed by a tensorflow-lite script to handle what it actually is in its current state.

…

Sadly, the photo is odd at best and even the most intrinsic source from TensorFlow-Lite cannot describe it well enough. So, w/out further ado…

Bab

This photo was changed on the AI.

Besides that…the above commands are okay but not for that specific piece of software.


debian@BeagleBone:~/tensors/image_classification$ ./classify.py --filename Bab.PNG --model_path ../mobilenet_v1_1.0_224_quant.tflite --label_path ../labels_mobilenet_quant_v1_224.txt
web site 0.45098039215686275
screwdriver 0.1411764705882353
screen 0.08627450980392157

Above is where you can see the commands given and what transpired. The mobilenet data guessed and with education in its guess, this outcome was clear about the web site at about 45%. It is just too odd of a photo.

Here is another piece of software in Python3.9 to handle tensors and mobilenet data from the classify.py file from our command.


#!/usr/bin/python3

# Copyright 2019 The TensorFlow Authors. All Rights Reserved.
#
# Licensed under the Apache License, Version 2.0 (the "License");
# you may not use this file except in compliance with the License.
# You may obtain a copy of the License at
#
#     http://www.apache.org/licenses/LICENSE-2.0
#
# Unless required by applicable law or agreed to in writing, software
# distributed under the License is distributed on an "AS IS" BASIS,
# WITHOUT WARRANTIES OR CONDITIONS OF ANY KIND, either express or implied.
# See the License for the specific language governing permissions and
# limitations under the License.

from tflite_runtime.interpreter import Interpreter
import numpy as np
import argparse
from PIL import Image

parser = argparse.ArgumentParser(description='Image Classification')
parser.add_argument('--filename', type=str, help='Specify the filename', required=True)
parser.add_argument('--model_path', type=str, help='Specify the model path', required=True)
parser.add_argument('--label_path', type=str, help='Specify the label map', required=True)
parser.add_argument('--top_k', type=int, help='How many top results', default=3)

args = parser.parse_args()

filename = args.filename
model_path = args.model_path
label_path = args.label_path
top_k_results = args.top_k

with open(label_path, 'r') as f:
    labels = list(map(str.strip, f.readlines()))

# Load TFLite model and allocate tensors
interpreter = Interpreter(model_path=model_path)
interpreter.allocate_tensors()

# Get input and output tensors.
input_details = interpreter.get_input_details()
output_details = interpreter.get_output_details()

# Read image
img = Image.open(filename).convert('RGB')

# Get input size
input_shape = input_details[0]['shape']
size = input_shape[:2] if len(input_shape) == 3 else input_shape[1:3]

# Preprocess image
img = img.resize(size)
img = np.array(img)

# Add a batch dimension
input_data = np.expand_dims(img, axis=0)

# Point the data to be used for testing and run the interpreter
interpreter.set_tensor(input_details[0]['index'], input_data)
interpreter.invoke()

# Obtain results and map them to the classes
predictions = interpreter.get_tensor(output_details[0]['index'])[0]

# Get indices of the top k results
top_k_indices = np.argsort(predictions)[::-1][:top_k_results]

for i in range(top_k_results):
    print(labels[top_k_indices[i]], predictions[top_k_indices[i]] / 255.0)

Seth

P.S. As you can tell in the from/import sections of the file, one will need python3-pil and python3-numpy, e.g. plus some above recommendations for the daring.

…

Also…to train, classify, and/or make models in TFLite on the BBAI, see here:

  1. Image classification  |  TensorFlow Lite
  2. Image classification with TensorFlow Lite Model Maker
  3. Object detection  |  TensorFlow Lite

and…

pip3 install tflite

@ tflite · PyPI

Hi man

Incredible work. I am looking to start running some Image Processing algorithms in the AI, but I’d like to offload the load to the EVE or DSP. Could you give me some recommendations? Main reason for this is because I am using it as a Flight Control System, and wouldn’t want the AI stuff to interfere with my main tasks, though my code runs with maximum priority (chrt -r 99), and I use timer interrupts.

Did you manage to get that working? Also, how many FPS are you getting? I didn’t get that from your posts.

For all practical purposes I’d be happy with something like 5-10 Hz as I can filter it, and I know it depends on the amount of objects you train it for, but still, I was just wondering what was your experience with this.

Look forward to hearing back form you.

1 Like

Hello Sir,

@pr0scar , I have not been able to offload the instances to the EVEs or DSPs so far. I am sorry.

Seth

P.S. I stopped at a certain point to endure other endeavors. I put the BBAI aside for a bit but if you want, I can revisit the idea…

  1. I do not know how to offload the data to the other co-processors
  2. I will look to TI and see if they ever made the EVEs and DPSs available for use
  3. I will also research the datasheets for the above, two co-processors

If you want, we can use each other for this endeavor. Also, I am open to suggestions from any other sources regarding the above statements.

Page 3 on the reference manual shows some nice TI.com docs. on the DSPs. I have not gotten to the EVEs yet:

chrome-extension://efaidnbmnnnibpcajpcglclefindmkaj/https://www.ti.com/lit/ug/spru657c/spru657c.pdf?ts=1659955462519

Hey @silver2row

Thank you for your prompt response.

I guess BB_AI hasn’t developed as much which I sort of expected.

Tbh, I haven’t worked as much with AI for image processing. I have some students which have done some really nice stuff with the Jetson NANO 4GB, and was hoping to get something similar even if it is not comparable in any way, with the main advantage for me being the overall size being more compact as in FCS + AI image processing in BB_AI + Robotics Cape (really compact and desirable for what I want to do, eg. autonomous racing drones with AI processing power).

And the EVE/DSP offload is merely desirable, but at this point not an absolute must, especially depending on the FPS that you get with the current solutions. Do you have any idea how much FPS you can get in the BB_AI whilst doing some simple classification with like less than 10 objects or something like this? I saw some examples by Jason Kridner in youtube which seemed to run really well.

Yes…and no.

@pr0scar , I have not gotten to this in quite a while. I can figure out the FPS on a simple USB cam but it will take time. If it is a must, I can always test it out.

I have the BBAI and a USB cam. I will need to find the specs. on the cam and then figure out a way to configure things so I am reading the FPS of the whole set up.

Seth

P.S. If you have an idea, shoot. I can always test it out on my end.

Sir, look here: ep-processor-libraries/dsplib - DSPLIB contains optimized signal processing functions for TI DSPs. .

That is their git repo. Now, how to understand the offload. Hmm. This will take time and effort. Both of which I have at times. I will look into it. I will look into the offloading and dsplib and then try w/ the USB Cam I currently have to figure out FPS from the am5729.

Hi @silver2row

Thank you for sharing that. I will definitely look into it. Let me just finish setting up my BB_AI + Robotics Cape as my FCS and will get back to you.

I’d appreciate any insights you find regarding computational load and FPS for even the most basic image processing (like color segmentation with openCV or something like that) with your USB camera.

Thanks a lot!

Hello @pr0scar ,

I think this command will find the correct FPS of the webcam: v4l2-ctl --list-formats-ext .

The ideas from that command are there:

ioctl: VIDIOC_ENUM_FMT
        Type: Video Capture

        [0]: 'YUYV' (YUYV 4:2:2)
                Size: Discrete 640x480
                        Interval: Discrete 0.033s (30.000 fps)
                        Interval: Discrete 0.050s (20.000 fps)
                        Interval: Discrete 0.067s (15.000 fps)
                        Interval: Discrete 0.100s (10.000 fps)
                        Interval: Discrete 0.133s (7.500 fps)
                Size: Discrete 1280x720
                        Interval: Discrete 0.100s (10.000 fps)
                        Interval: Discrete 0.133s (7.500 fps)
                Size: Discrete 960x544
                        Interval: Discrete 0.067s (15.000 fps)
                        Interval: Discrete 0.100s (10.000 fps)
                        Interval: Discrete 0.133s (7.500 fps)
                Size: Discrete 800x448
                        Interval: Discrete 0.050s (20.000 fps)
                        Interval: Discrete 0.067s (15.000 fps)
                        Interval: Discrete 0.100s (10.000 fps)
                        Interval: Discrete 0.133s (7.500 fps)
                Size: Discrete 640x360
                        Interval: Discrete 0.033s (30.000 fps)
                        Interval: Discrete 0.050s (20.000 fps)
                        Interval: Discrete 0.067s (15.000 fps)
                        Interval: Discrete 0.100s (10.000 fps)
                        Interval: Discrete 0.133s (7.500 fps)
                Size: Discrete 424x240
                        Interval: Discrete 0.033s (30.000 fps)
                        Interval: Discrete 0.050s (20.000 fps)
                        Interval: Discrete 0.067s (15.000 fps)
                        Interval: Discrete 0.100s (10.000 fps)
                        Interval: Discrete 0.133s (7.500 fps)
                Size: Discrete 352x288
                        Interval: Discrete 0.033s (30.000 fps)
                        Interval: Discrete 0.050s (20.000 fps)
                        Interval: Discrete 0.067s (15.000 fps)
                        Interval: Discrete 0.100s (10.000 fps)
                        Interval: Discrete 0.133s (7.500 fps)
                Size: Discrete 320x240
                        Interval: Discrete 0.033s (30.000 fps)
                        Interval: Discrete 0.050s (20.000 fps)
                        Interval: Discrete 0.067s (15.000 fps)
                        Interval: Discrete 0.100s (10.000 fps)
                        Interval: Discrete 0.133s (7.500 fps)
                Size: Discrete 800x600
                        Interval: Discrete 0.067s (15.000 fps)
                        Interval: Discrete 0.100s (10.000 fps)
                        Interval: Discrete 0.133s (7.500 fps)
                Size: Discrete 176x144
                        Interval: Discrete 0.033s (30.000 fps)
                        Interval: Discrete 0.050s (20.000 fps)
                        Interval: Discrete 0.067s (15.000 fps)
                        Interval: Discrete 0.100s (10.000 fps)
                        Interval: Discrete 0.133s (7.500 fps)
                Size: Discrete 160x120
                        Interval: Discrete 0.033s (30.000 fps)
                        Interval: Discrete 0.050s (20.000 fps)
                        Interval: Discrete 0.067s (15.000 fps)
                        Interval: Discrete 0.100s (10.000 fps)
                        Interval: Discrete 0.133s (7.500 fps)
                Size: Discrete 1280x800
                        Interval: Discrete 0.100s (10.000 fps)
        [1]: 'MJPG' (Motion-JPEG, compressed)
                Size: Discrete 640x480
                        Interval: Discrete 0.033s (30.000 fps)
                        Interval: Discrete 0.050s (20.000 fps)
                        Interval: Discrete 0.067s (15.000 fps)
                        Interval: Discrete 0.100s (10.000 fps)
                        Interval: Discrete 0.133s (7.500 fps)
                Size: Discrete 1280x720
                        Interval: Discrete 0.033s (30.000 fps)
                        Interval: Discrete 0.050s (20.000 fps)
                        Interval: Discrete 0.067s (15.000 fps)
                        Interval: Discrete 0.100s (10.000 fps)
                        Interval: Discrete 0.133s (7.500 fps)
                Size: Discrete 960x544
                        Interval: Discrete 0.033s (30.000 fps)
                        Interval: Discrete 0.050s (20.000 fps)
                        Interval: Discrete 0.067s (15.000 fps)
                        Interval: Discrete 0.100s (10.000 fps)
                        Interval: Discrete 0.133s (7.500 fps)
                Size: Discrete 800x448
                        Interval: Discrete 0.033s (30.000 fps)
                        Interval: Discrete 0.050s (20.000 fps)
                        Interval: Discrete 0.067s (15.000 fps)
                        Interval: Discrete 0.100s (10.000 fps)
                        Interval: Discrete 0.133s (7.500 fps)
                Size: Discrete 640x360
                        Interval: Discrete 0.033s (30.000 fps)
                        Interval: Discrete 0.050s (20.000 fps)
                        Interval: Discrete 0.067s (15.000 fps)
                        Interval: Discrete 0.100s (10.000 fps)
                        Interval: Discrete 0.133s (7.500 fps)
                Size: Discrete 800x600
                        Interval: Discrete 0.033s (30.000 fps)
                        Interval: Discrete 0.050s (20.000 fps)
                        Interval: Discrete 0.067s (15.000 fps)
                        Interval: Discrete 0.100s (10.000 fps)
                        Interval: Discrete 0.133s (7.500 fps)
                Size: Discrete 416x240
                        Interval: Discrete 0.033s (30.000 fps)
                        Interval: Discrete 0.050s (20.000 fps)
                        Interval: Discrete 0.067s (15.000 fps)
                        Interval: Discrete 0.100s (10.000 fps)
                        Interval: Discrete 0.133s (7.500 fps)
                Size: Discrete 352x288
                        Interval: Discrete 0.033s (30.000 fps)
                        Interval: Discrete 0.050s (20.000 fps)
                        Interval: Discrete 0.067s (15.000 fps)
                        Interval: Discrete 0.100s (10.000 fps)
                        Interval: Discrete 0.133s (7.500 fps)
                Size: Discrete 176x144
                        Interval: Discrete 0.033s (30.000 fps)
                        Interval: Discrete 0.050s (20.000 fps)
                        Interval: Discrete 0.067s (15.000 fps)
                        Interval: Discrete 0.100s (10.000 fps)
                        Interval: Discrete 0.133s (7.500 fps)
                Size: Discrete 320x240
                        Interval: Discrete 0.033s (30.000 fps)
                        Interval: Discrete 0.050s (20.000 fps)
                        Interval: Discrete 0.067s (15.000 fps)
                        Interval: Discrete 0.100s (10.000 fps)
                        Interval: Discrete 0.133s (7.500 fps)
                Size: Discrete 160x120
                        Interval: Discrete 0.033s (30.000 fps)
                        Interval: Discrete 0.050s (20.000 fps)
                        Interval: Discrete 0.067s (15.000 fps)
                        Interval: Discrete 0.100s (10.000 fps)
                        Interval: Discrete 0.133s (7.500 fps)

Hello,

@pr0scar , sorry for all this touch and go here but…

  1. I cannot get numpy installed on my machine w/ it being recognized. I have an older image w/ 4.19.x on it.
  2. I used sudo apt install python3-numpy but the system I currently have is discarding it.
  3. I will update you soon on the USB Cam and FPS on the OpenCV ideas…

Seth

Thank you!

Look forward to it.

Hello,

@pr0scar , I am building OpenCV now to test out the Python3 modules available in the /samples dir.

I will find a way to figure out how to get FPS but my Webcam only processes 30 FPS maximum. That is w/ nothing else in the way. Anyway, I will try to figure it out.

Seth

P.S. I rebooted into a new image, am updating OpenCV now, and I will get back to you regarding a single instance of OpenCV data translation and the FPS from the webcam.

Otay…so. Building OpenCV from scratch will not work. I can always type up some source for OpenCV but numpy is not being recognized any longer on Bullseye for now. So, up the creek w/out a paddle for now.

@pr0scar ,

Okay so…

  1. People online claim to have the cure for displaying FPS on live video.
  2. I cannot account for their dealings and source.
  3. OpenCV works w/ samples in Python3.

a. Take the files out of the samples directory and add them to your own dir.
b. Instead of #!/usr/bin/env python , use #!/usr/bin/python3 .
c. a. might not need to take place but it will be supported a bit easier on your own machine.

Okay…about FPS, I tried many ways so far. I can only choose my FPS instead of actually rendering it during a live stream (so far).

Seth

P.S. If you come across the video.py file from the opencv/samples/python/ dir, try to use it and adjust your FPS via ffmpeg ffprobe. Also, reading files from the ffprobe on the video.py file…

  libavutil      56. 51.100 / 56. 51.100
  libavcodec     58. 91.100 / 58. 91.100
  libavformat    58. 45.100 / 58. 45.100
  libavdevice    58. 10.100 / 58. 10.100
  libavfilter     7. 85.100 /  7. 85.100
  libavresample   4.  0.  0 /  4.  0.  0
  libswscale      5.  7.100 /  5.  7.100
  libswresample   3.  7.100 /  3.  7.100
  libpostproc    55.  7.100 / 55.  7.100
video.py: Invalid data found when processing input

Something is eerie.

ffprobe snap.jpg snap.jpg is a file from the live feed I took while streaming...

  libavutil      56. 51.100 / 56. 51.100
  libavcodec     58. 91.100 / 58. 91.100
  libavformat    58. 45.100 / 58. 45.100
  libavdevice    58. 10.100 / 58. 10.100
  libavfilter     7. 85.100 /  7. 85.100
  libavresample   4.  0.  0 /  4.  0.  0
  libswscale      5.  7.100 /  5.  7.100
  libswresample   3.  7.100 /  3.  7.100
  libpostproc    55.  7.100 / 55.  7.100
[mjpeg @ 0x201ac20] EOI missing, emulating
Input #0, image2, from 'snap.jpg':
  Duration: 00:00:00.04, start: 0.000000, bitrate: 84 kb/s
    Stream #0:0: Video: mjpeg (Baseline), yuvj422p(pc, bt470bg/unknown/unknown), 320x240, 25 tbr, 25 tbn, 25 tbc

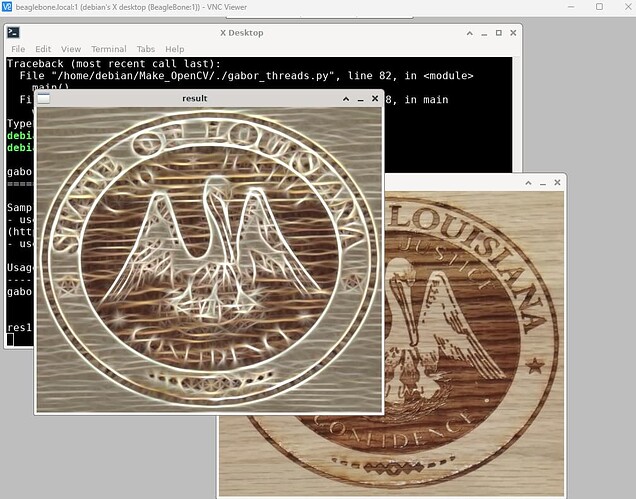
Here is the older script for gabor_threads.py but w/ my own image…

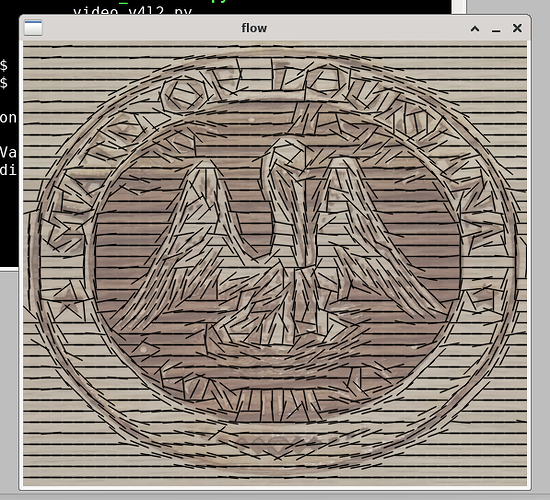
and another from the direction of wood…supposedly. Supposedly!

One more thing…This is pretty cool and there is some odd music in the background. Forgive me.

Ideas from OpenCV again. This is recorded on the BBAI for source running on the BBAI and all while porting it to Windows via applications from a Linux Host (BBAI)!