So I have my Pocket Beagle up and running via USB connection to Laptop (WIndows and Linux), I saw the information about using Click boards, so I bought a few - ethernet, wifi, serial, Lcd, etc. Now I’m thinking…how do I attach these? Am I suppose to solder on a MikroBus Socket? Put on Female Headers? Solder direct? There seems to be very little documentation on this. Some of the boards are 3.7 volt - I have a 3.7 volt Lipo I use with Pi Zero’s, am I supposed to use a 3.7 Lipo to use those Clicks that only support 3.7? Maybe this is in the “everyone knows” category, but I’d really like to expand the little board - I’ll use it to connect to my HP 200LX! Otherwise it’s just a board I connect to my laptop when I want to use it.
Only use "3.3v" Click boards...
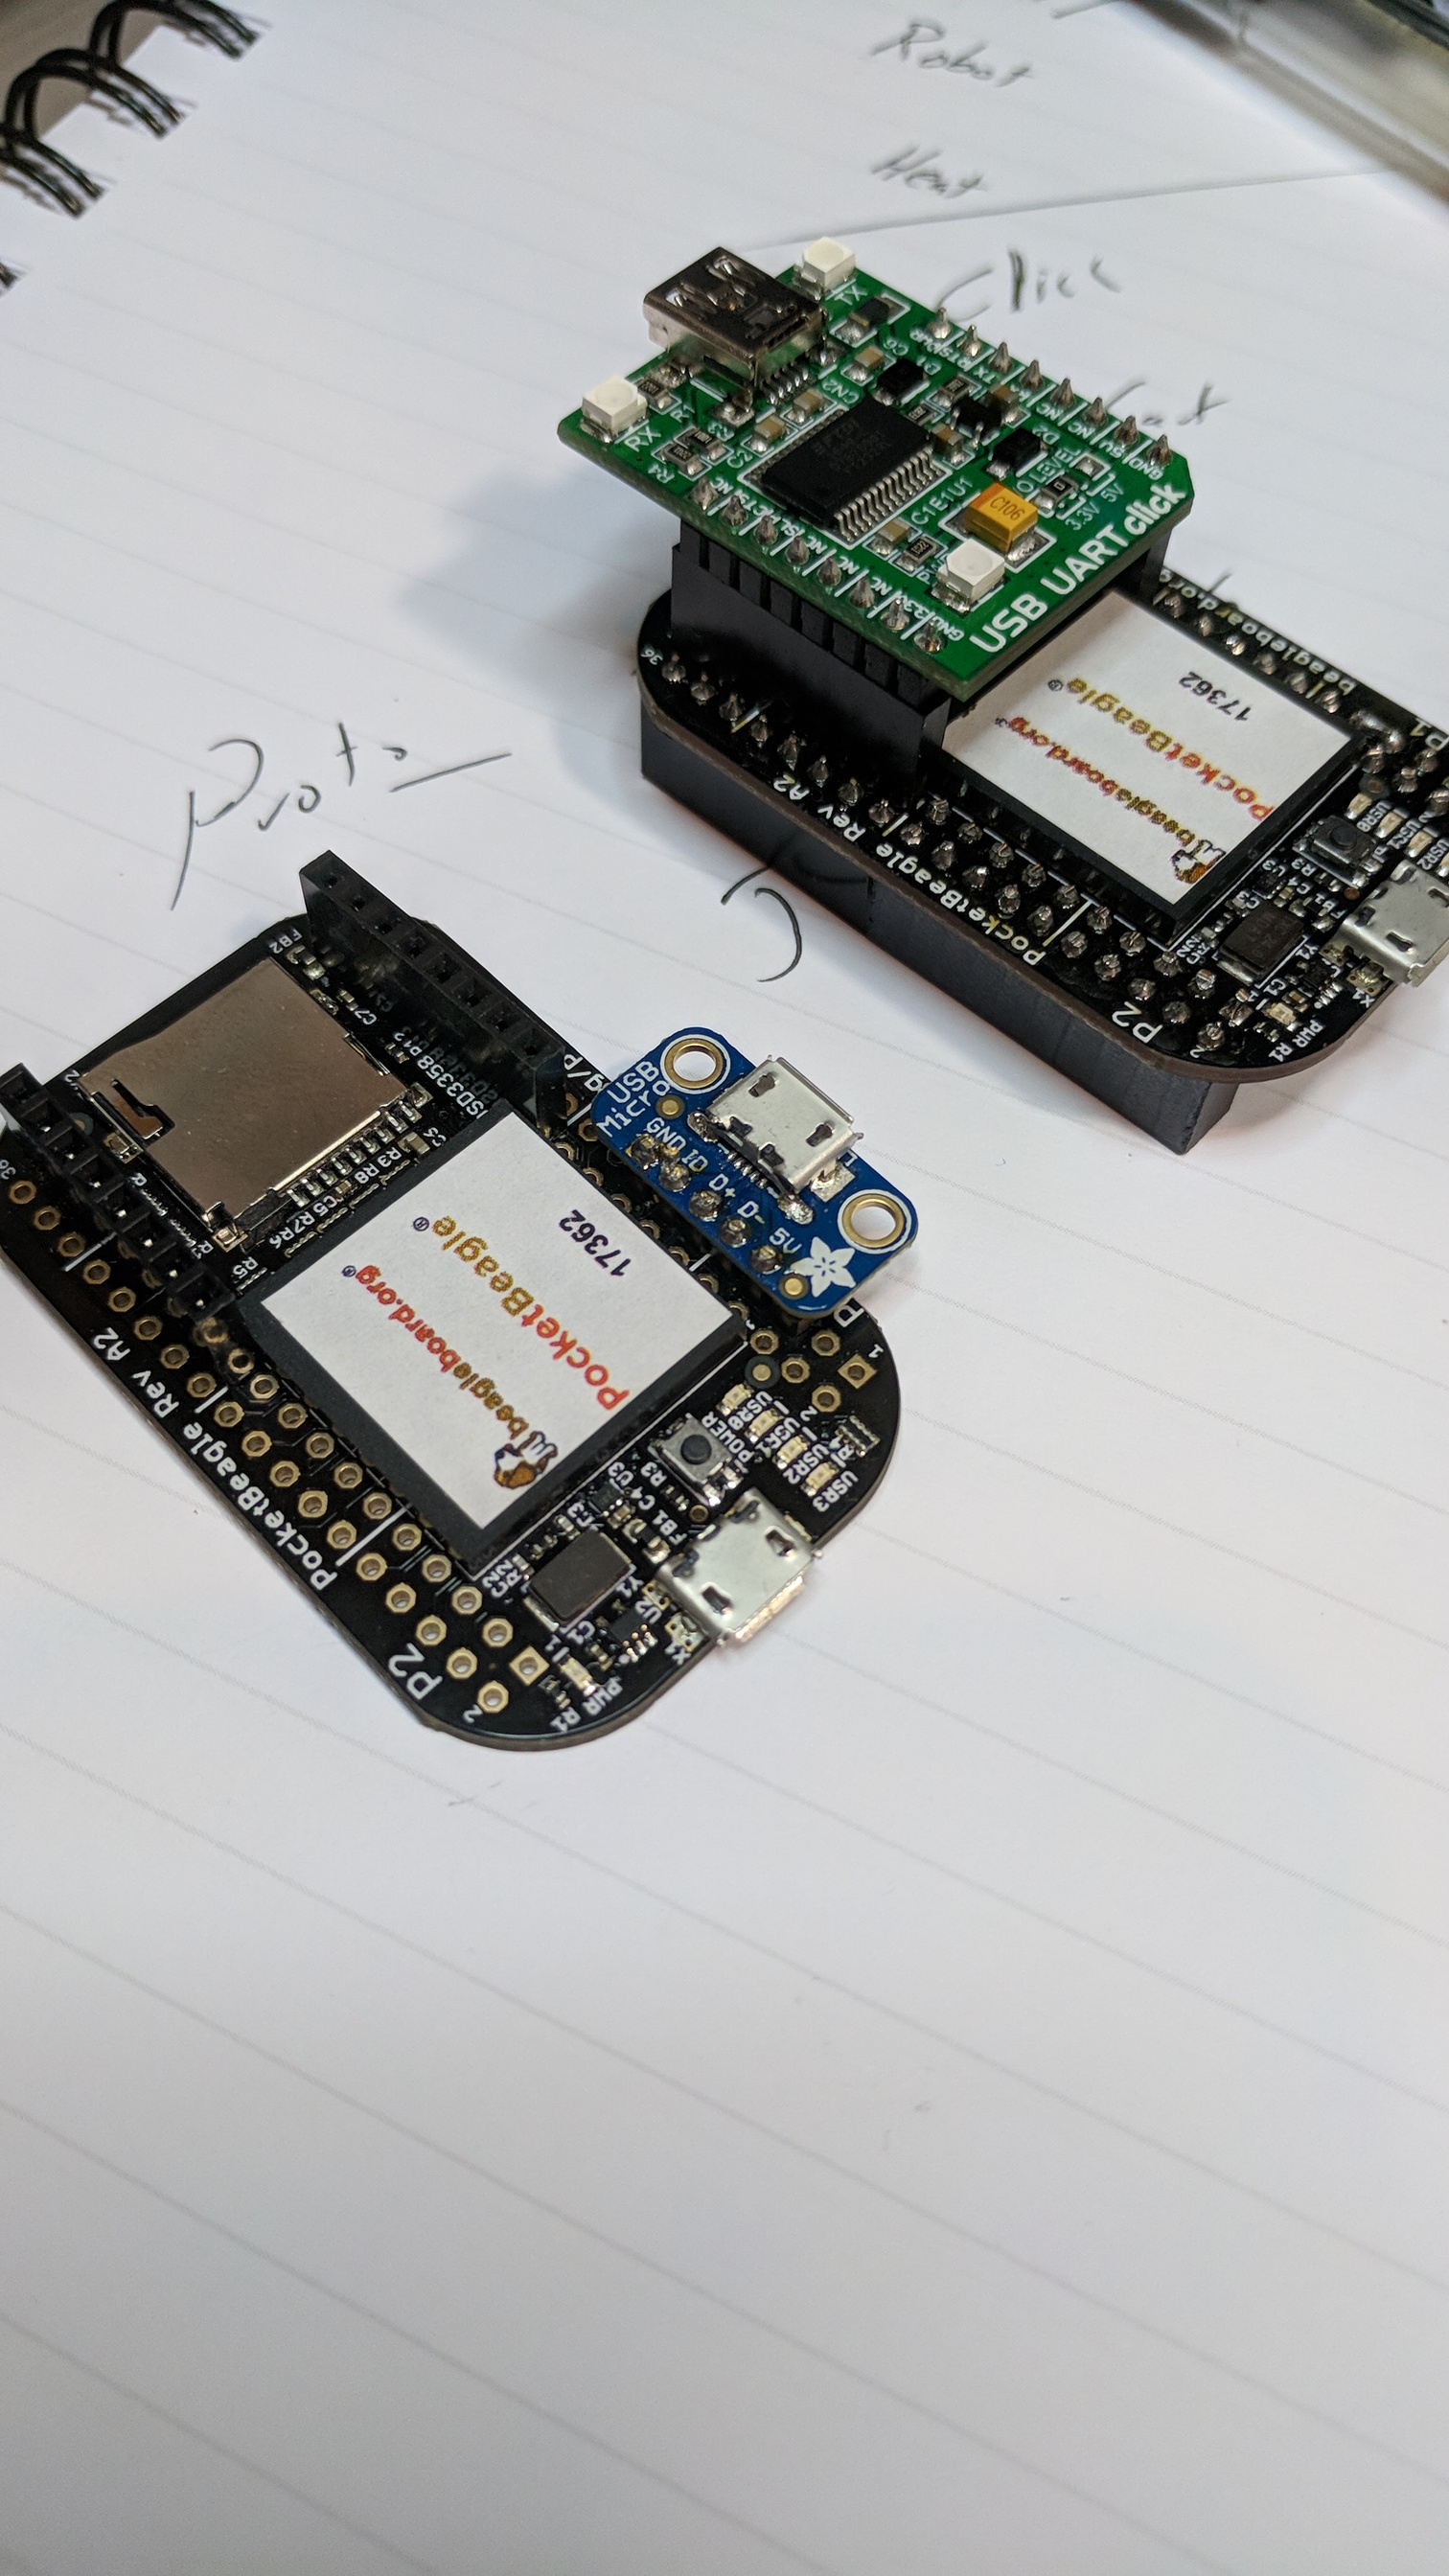
You'll need a pair of these:
https://www.digikey.com/products/en?keywords=S7006-ND
Up to 4 possible, for 2 click boards installed at a time..
Best place is over the microSD, as the push button would be under a
Click board..
Here is the list of "working" click boards:
https://github.com/beagleboard/pocketbeagle/wiki/mikroBus™-Click-Boards
Feel free to add more details when you get your to work..
Regards,
1 Like
Thanks so much, I have ordered the headers and I’ll see what I can get working.
Thanks, I soldered the headers on, uncommented the lines in uEnv.txt, and got the ETH-WIZ-CLICK working. I’d like to get the Wifi click working, but I don’t see an appropriate entry in /lib/firmware to use. I’d also like to get the RS-232 Click to work, but it looks like the USB-UART is the easiest to try next.
I also bought a click adapter for RPI so I can play with the boards on RPI also.
All the wifi boards look to be uart based.. Just use the "config-pin
Px_yz uart" option on both rx/tx..
Regards,
I will give that a go. With the USB add-on board soldered on and a wifi-click I would have quite the portable beagle.