SEED BEAGLEBONE GREEN WIFI SPI NOT WORKING

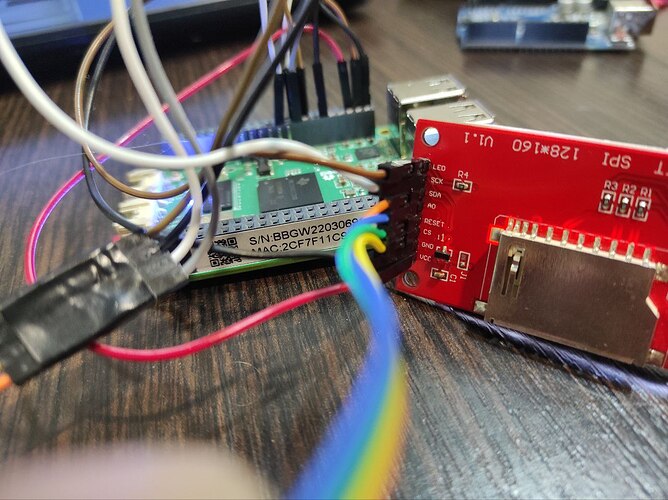
Hi all. I got a BEagleBone Green Wifi board, I’m a novice developer and I’m trying to connect a st7735 display via the SPI bus. No matter how I try to change the code, nothing happens. The worker tested the display on a UNO board. Help me please).

I trying this example, but not working


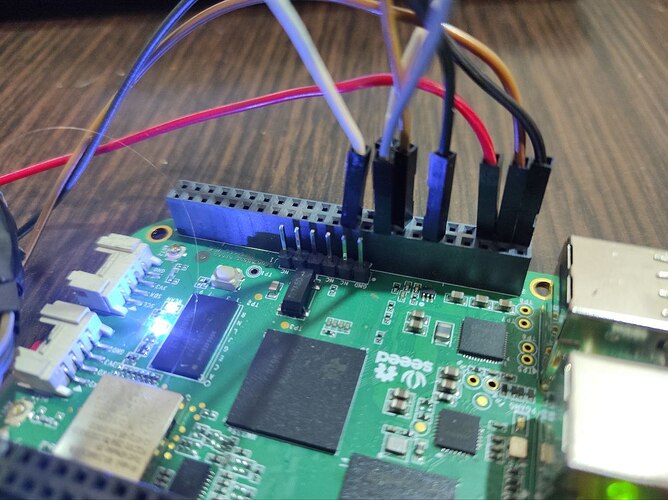
So with the Green Wireless, there’s two extra caps that need to be removed… Here’s a good photo of what needs to be done:

Regards,

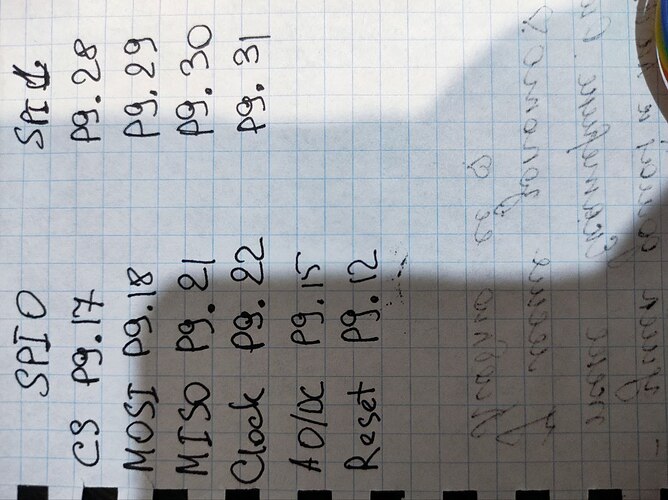
Thank you. If I understand correctly this is for the SPI 0 bus. But I tried connecting to SPI 1, but it doesn’t work. Perhaps I entered the settings incorrectly?

from PIL import Image
from PIL import ImageDraw
from PIL import ImageFont

import ST7735 as TFT
import Adafruit_GPIO as GPIO
import Adafruit_GPIO.SPI as SPI


WIDTH = 128
HEIGHT = 160
SPEED_HZ = 4000000


# Raspberry Pi configuration.
#DC = 24
#RST = 25
#SPI_PORT = 0
#SPI_DEVICE = 0

# BeagleBone Black configuration.
DC = 'P9_15'
RST = 'P9_12'
SPI_PORT = 1   #for spi 0 connection
SPI_DEVICE = 0 

# Create TFT LCD display class.
disp = TFT.ST7735(
    DC,
    rst=RST,
    spi=SPI.SpiDev(
        SPI_PORT,
        SPI_DEVICE,
        max_speed_hz=SPEED_HZ))

I removed the capacitors. But it doesn’t work for me. I don’t know what to try anymore?

lsmod | grep spidev

spidev 20480 0

# Copyright (c) 2014 Adafruit Industries
# Author: Tony DiCola
#
# Permission is hereby granted, free of charge, to any person obtaining a copy
# of this software and associated documentation files (the "Software"), to deal
# in the Software without restriction, including without limitation the rights
# to use, copy, modify, merge, publish, distribute, sublicense, and/or sell
# copies of the Software, and to permit persons to whom the Software is
# furnished to do so, subject to the following conditions:
#
# The above copyright notice and this permission notice shall be included in
# all copies or substantial portions of the Software.
#
# THE SOFTWARE IS PROVIDED "AS IS", WITHOUT WARRANTY OF ANY KIND, EXPRESS OR
# IMPLIED, INCLUDING BUT NOT LIMITED TO THE WARRANTIES OF MERCHANTABILITY,
# FITNESS FOR A PARTICULAR PURPOSE AND NONINFRINGEMENT. IN NO EVENT SHALL THE
# AUTHORS OR COPYRIGHT HOLDERS BE LIABLE FOR ANY CLAIM, DAMAGES OR OTHER
# LIABILITY, WHETHER IN AN ACTION OF CONTRACT, TORT OR OTHERWISE, ARISING FROM,
# OUT OF OR IN CONNECTION WITH THE SOFTWARE OR THE USE OR OTHER DEALINGS IN
# THE SOFTWARE.
from PIL import Image
from PIL import ImageDraw
from PIL import ImageFont

import ST7735 as TFT
import Adafruit_GPIO as GPIO
import Adafruit_GPIO.SPI as SPI


WIDTH = 128
HEIGHT = 160
SPEED_HZ = 4000000


# Raspberry Pi configuration.
#DC = 24
#RST = 25
#SPI_PORT = 0
#SPI_DEVICE = 0

# BeagleBone Black configuration
DC = 'P9_15'
RST = 'P9_12'
SPI_PORT = 1
SPI_DEVICE = 0

# Create TFT LCD display class.
disp = TFT.ST7735(
    DC,
    rst=RST,
    spi=SPI.SpiDev(
        SPI_PORT,
        SPI_DEVICE,
        max_speed_hz=SPEED_HZ))

# Initialize display.
disp.begin()

# Clear the display to a red background.
# Can pass any tuple of red, green, blue values (from 0 to 255 each).
disp.clear((255, 0, 0))

# Alternatively can clear to a black screen by calling:
# disp.clear()

# Get a PIL Draw object to start drawing on the display buffer.
draw = disp.draw()

# Draw some shapes.
# Draw a blue ellipse with a green outline.
draw.ellipse((10, 10, 110, 80), outline=(0,255,0), fill=(0,0,255))

# Draw a purple rectangle with yellow outline.
draw.rectangle((10, 90, 110, 160), outline=(255,255,0), fill=(255,0,255))

# Draw a white X.
draw.line((10, 170, 110, 230), fill=(255,255,255))
draw.line((10, 230, 110, 170), fill=(255,255,255))

# Draw a cyan triangle with a black outline.
draw.polygon([(10, 275), (110, 240), (110, 310)], outline=(0,0,0), fill=(0,255,255))

# Load default font.
font = ImageFont.load_default()

# Alternatively load a TTF font.
# Some other nice fonts to try: http://www.dafont.com/bitmap.php
#font = ImageFont.truetype('Minecraftia.ttf', 16)

# Define a function to create rotated text.  Unfortunately PIL doesn't have good
# native support for rotated fonts, but this function can be used to make a
# text image and rotate it so it's easy to paste in the buffer.
def draw_rotated_text(image, text, position, angle, font, fill=(255,255,255)):
    # Get rendered font width and height.
    draw = ImageDraw.Draw(image)
    width, height = draw.textsize(text, font=font)
    # Create a new image with transparent background to store the text.
    textimage = Image.new('RGBA', (width, height), (0,0,0,0))
    # Render the text.
    textdraw = ImageDraw.Draw(textimage)
    textdraw.text((0,0), text, font=font, fill=fill)
    # Rotate the text image.
    rotated = textimage.rotate(angle, expand=1)
    # Paste the text into the image, using it as a mask for transparency.
    image.paste(rotated, position, rotated)

# Write two lines of white text on the buffer, rotated 90 degrees counter clockwise.
draw_rotated_text(disp.buffer, 'Hello World!', (150, 120), 90, font, fill=(255,255,255))
draw_rotated_text(disp.buffer, 'This is a line of text.', (170, 90), 90, font, fill=(255,255,255))

# Write buffer to display hardware, must be called to make things visible on the
# display!
disp.display()
Please run sudo beagle-version so we can see the u-boot/overlay loading situation…

Regards,

sudo beagle -version  :: not found

Ah, sorry on an older image, run this script instead…

sudo /opt/scripts/tools/version.sh

Regards,

If it’s not difficult for you, explain where you need to look to find what’s wrong. Thank you)

git:/opt/scripts/:[b39ec679648a6be8f25f48bd1c9784c1fc5a0c46]
eeprom:[A335BNLTGW1ABBGW22030691]
model:[TI_AM335x_BeagleBone_Green_Wireless]
dogtag:[BeagleBoard.org Debian Buster IoT Image 2020-04-06]
bootloader:[microSD-(push-button)]:[/dev/mmcblk0]:[U-Boot 2019.04-00002-g07d5700e21]:[location: dd MBR]
bootloader:[eMMC-(default)]:[/dev/mmcblk1]:[U-Boot 2019.04-g923f8b8]:[location: dd MBR]
UBOOT: Booted Device-Tree:[am335x-bonegreen-wireless-uboot-univ.dts]
UBOOT: Loaded Overlay:[AM335X-PRU-RPROC-4-19-TI-00A0]
UBOOT: Loaded Overlay:[BB-ADC-00A0.bb.org-overlays]
UBOOT: Loaded Overlay:[BB-BBGW-WL1835-00A0.bb.org-overlays]
UBOOT: Loaded Overlay:[BB-BONE-eMMC1-01-00A0.bb.org-overlays]
kernel:[4.19.94-ti-r42]
nodejs:[v10.24.0]
/boot/uEnv.txt Settings:
uboot_overlay_options:[enable_uboot_overlays=1]
uboot_overlay_options:[uboot_overlay_pru=/lib/firmware/AM335X-PRU-RPROC-4-19-TI-00A0.dtbo]
uboot_overlay_options:[enable_uboot_cape_universal=1]
pkg check: to individually upgrade run: [sudo apt install --only-upgrade <pkg>]
pkg:[bb-cape-overlays]:[4.14.20210821.0-0~buster+20210821]
pkg:[bb-wl18xx-firmware]:[1.20230414.0-0~buster+20230414]
pkg:[kmod]:[26-1]
pkg:[librobotcontrol]:[1.0.5-git20200715.0-0~buster+20200716]
pkg:[firmware-ti-connectivity]:[20190717-2rcnee1~buster+20200305]
groups:[debian : debian adm kmem dialout cdrom floppy audio dip video plugdev users systemd-journal bluetooth netdev i2c gpio pwm eqep remoteproc admin spi iio docker tisdk weston-launch xenomai cloud9ide]
cmdline:[console=ttyS0,115200n8 bone_capemgr.uboot_capemgr_enabled=1 root=/dev/mmcblk0p1 ro rootfstype=ext4 rootwait coherent_pool=1M net.ifnames=0 lpj=1990656 rng_core.default_quality=100 quiet]
dmesg | grep remote
[   10.897837] remoteproc remoteproc0: 4a334000.pru is available
[   10.917601] remoteproc remoteproc1: 4a338000.pru is available
[   38.048962] Bluetooth: hci0: change remote baud rate command in firmware
[   48.745065] remoteproc remoteproc2: wkup_m3 is available
[   48.752188] remoteproc remoteproc2: powering up wkup_m3
[   48.752216] remoteproc remoteproc2: Booting fw image am335x-pm-firmware.elf, size 217168
[   48.752468] remoteproc remoteproc2: remote processor wkup_m3 is now up
dmesg | grep pru
[   10.897837] remoteproc remoteproc0: 4a334000.pru is available
[   10.898024] pru-rproc 4a334000.pru: PRU rproc node pru@4a334000 probed successfully
[   10.917601] remoteproc remoteproc1: 4a338000.pru is available
[   10.917801] pru-rproc 4a338000.pru: PRU rproc node pru@4a338000 probed successfully
dmesg | grep pinctrl-single
[    0.945553] pinctrl-single 44e10800.pinmux: 142 pins, size 568
[    1.395458] pinctrl-single 44e10800.pinmux: pin PIN30 already requested by 481a6000.serial; cannot claim for leds
[    1.405926] pinctrl-single 44e10800.pinmux: pin-30 (leds) status -22
[    1.412345] pinctrl-single 44e10800.pinmux: could not request pin 30 (PIN30) from group pinmux_bt_pins  on device pinctrl-single
dmesg | grep gpio-of-helper
[    0.958090] gpio-of-helper ocp:cape-universal: ready
lsusb
Bus 001 Device 002: ID 05e3:0610 Genesys Logic, Inc. 4-port hub
Bus 001 Device 001: ID 1d6b:0002 Linux Foundation 2.0 root hub
END

In /boot/uEnv.txt,

enable:

BB-SPIDEV0-00A0.dtbo
or
BB-SPIDEV1-00A0.dtbo

this will give you access to /dev/spidevX.Y so you can control the bus directly…

There is a mainline driver for this screen now…

https://git.kernel.org/pub/scm/linux/kernel/git/torvalds/linux.git/tree/Documentation/devicetree/bindings/display/sitronix,st7735r.yaml

Digging more, it looks like this driver exists in 4.19.x sitronix,st7735r.txt « display « bindings « devicetree « Documentation - kernel/git/stable/linux.git - Linux kernel stable tree

Regards,

1 Like

Everything worked out for me. I used your advice to install
BB-SPIDEV0-00A0.dtbo or
BB-SPIDEV1-00A0.dtbo.
When I installed BB-SPIDEV1-00A0.dtbo, the Cloud 9 web interface stopped working for me. I started debugging via a USB-TTL converter.

Now the configuration is like this
BB-SPIDEV0-00A0.dtbo
And
CS P9_19 (SPI1_CS1)
MOSI P9_18
CLK P9_22
A0|DC P9_15
RST P9_12

python code parameters

SPI_PORT = 0
SPI_DEVICE = 1

Thanks a lot!!!